Tutorial: Install NodeBB on DigitalOcean/Ubuntu 20.04
Disclaimer: Referral links are present in this article. DigitalOcean doesn't pay us to recommend them, we just like them a lot.
Interested in installing NodeBB? There has always been a latent demand for free forum software – oftentimes, monetary investment in a solution does not make sense for communities just starting out, or smaller enthusiast forums.
At the same time, community leaders often don't have the technical know-how to install software such as NodeBB, especially when the steps require use of the command line. It often becomes an instant no-go for some evaluations of the software. In reality, the use of the command line is minimal, and this guide aims to be used as a reference for installing NodeBB, and making it accessible to even those with minimal-to-no background knowledge with the bash shell. (If you don't know what the bash shell is – perfect! This guide is for you.)
The good news is that NodeBB is free and open-source forum software, so anybody can install and set it up, even you!
Step 1: Register for a new DigitalOcean account
We use DigitalOcean in our guide as our cloud hosting service because they provide powerful virtual private servers (that's a good thing) at a very affordable price. What's more, they make it super easy to get started for free via our referral link. The kind folks at DigitalOcean will pre-load your account with $100 in credit if you use our referral link1 — superb!
Step 2: Generate and add your SSH public key to your DigitalOcean account
A password is baseline security for a server, but we want to take this a step further and use a cryptographic key to ensure that only we (that is, you!) can access the server.
Windows users
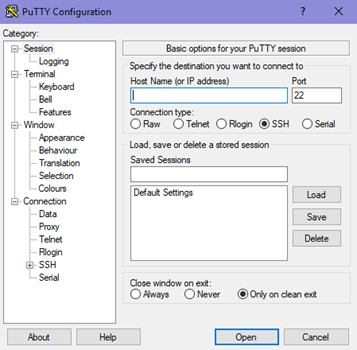
On Windows, you can download and install PuTTY, and generate an SSH key with the PuTTYgen utility. If in doubt, the 64-bit versions is probably the one you want to download.
PuTTY lets you remotely log into your new droplet.
The PuTTYgen utility (Start → All Programs → PuTTY → PuTTYgen) lets you generate SSH keys for use in securing your droplet:
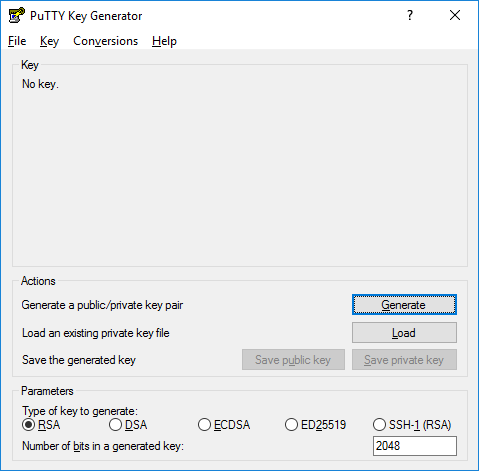
Generate a public key, and save both the public and private keys. You can choose whatever options you want, and the defaults are probably fine. I'd recommend generating an ED25519 key.
Open the public key (it ends in .pub) using something like Notepad and upload it to Digital Ocean (see step 2a.)
Linux users
Linux comes with tools to generate your own SSH key.
- Execute this:
ssh-keygen -t ed25519 - ... and your key will be located at
$HOME/.ssh/id_ed25519.pub
Take the public key (it ends in .pub) and upload it to Digital Ocean. You can view it by opening it with gedit, or nano on the command line.
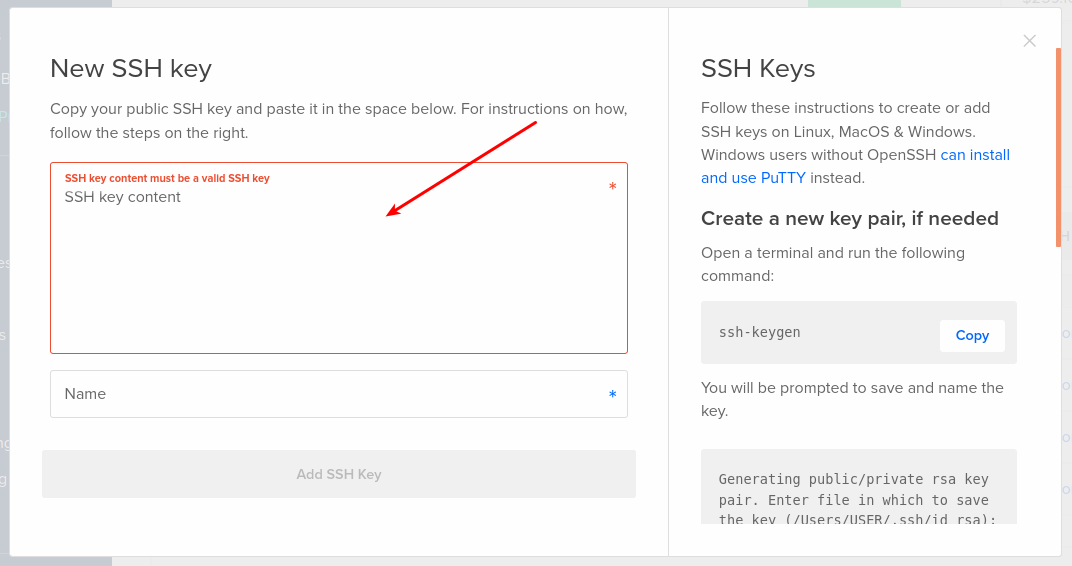
Step 2a: Upload your SSH public key to DigitalOcean
Note that I specified public key! Your private key is much like a password, keep it closely guarded. The public key you can share with whomever you'd like.
The analogy I like to use is that giving someone your public key is safe because the only thing they can do with it is let you into their server.
Similarly, this is what we're doing when we upload our public key to DigitalOcean. They keep a record of it, and they can set it up on your new droplet (Step 3) so that you (and you alone) will be able to access it.
Step 3: Create your first droplet running Ubuntu
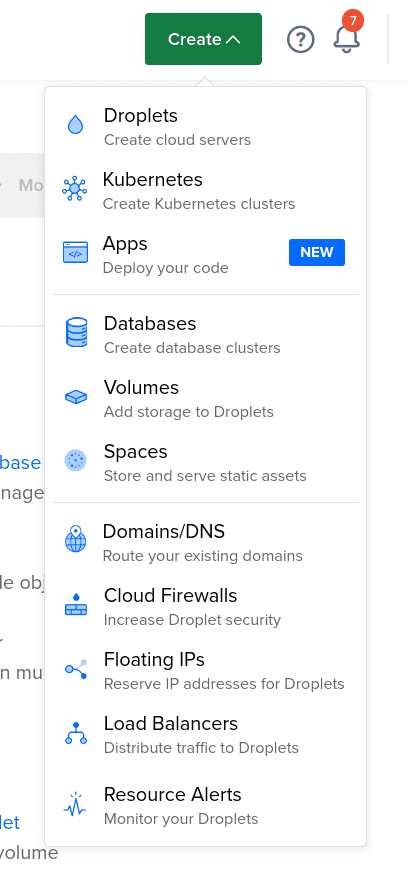
Each virtual private server (VPS) is called a "droplet" on DigitalOcean. (Get it? Because it's a droplet in an ocean?) That's about as far as the analogy goes, because it's identical to other VPSes you can rent from other cloud hosting companies. At the top right will be a green Create button, click that and click Droplets to get started.
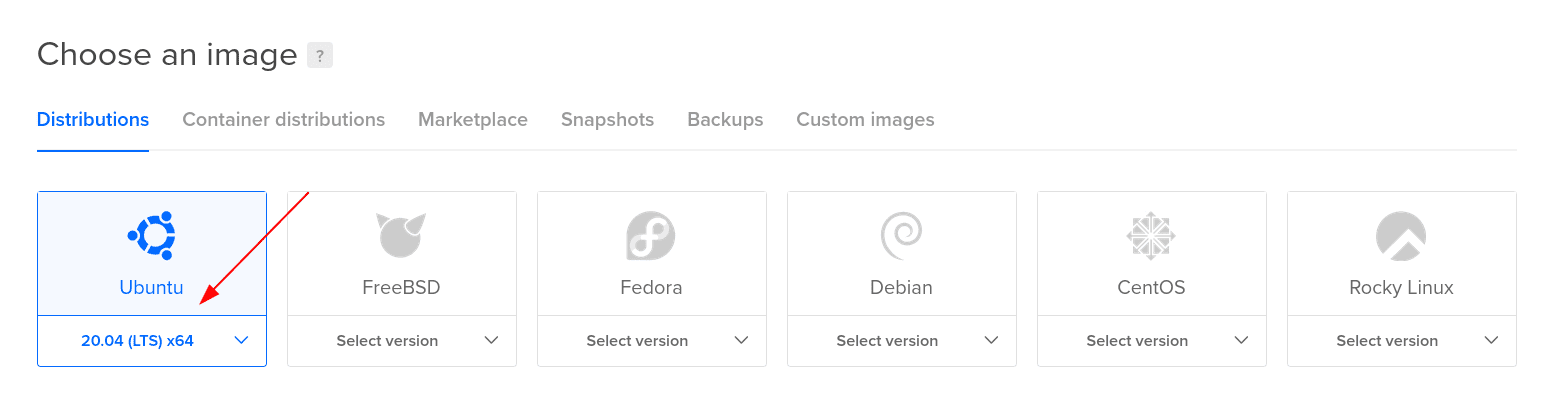
The next screen is a little intimidating, due to the sheer amount of options, but here are our recommendations for your new droplet:
- Ubuntu 20.04
- We recommend Ubuntu 20.04 because it is the LTS version, and comes with a whopping four years of security updates. That's a good thing.
- Standard $10 droplet (2GB RAM, 1 CPU)
- You can definitely get away with a $5 server. NodeBB is fairly light on resources, but you can never have too much memory :)
- You can choose to locate your droplet in any one of DigitalOcean's many datacenters. You'll probably want to choose one closest to you, geographically.
- Select Monitoring for better metrics, and IPv6 for future compatibility.

- Add backups – this one's important, because having external backups taken weekly is a good complement to an on-disk backup

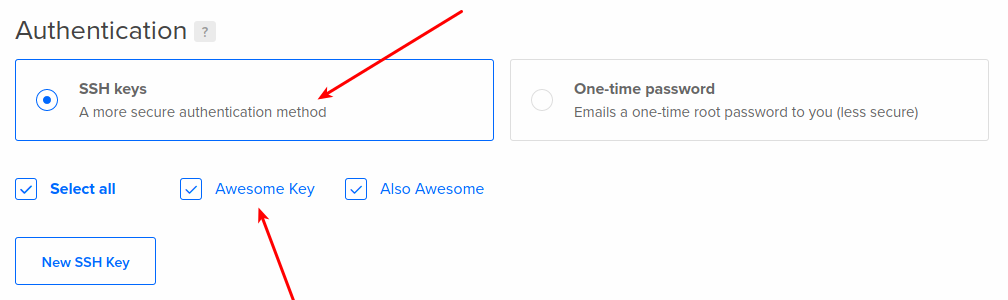
- Under the Authentication section, select the SSH key you added in Step 2.
From here, you can name your droplet whatever you want, and click Create Droplet. You'll be treated to a neat little progress bar as DigitalOcean spins up your droplet, and then you'll be good to go! Move on to step 4...

Step 4: Log into your new Droplet and install some necessary software to run NodeBB and harden your server
You can log into your server now. On Windows, use PuTTY to log into root@SERVER-IP where SERVER-IP is the public IP address of your new droplet, as reported by DigitalOcean. On Linux, just ssh root@SERVER-IP.
If all goes well, you'll be greeted by a welcome banner, and a prompt that looks a little like this:
root@myserver:~$ Run the following commands to set up Node.js and MongoDB. Node.js is the server language that NodeBB runs on, and MongoDB is one of the underlying databases that NodeBB can use:
wget -qO - https://www.mongodb.org/static/pgp/server-4.4.asc | sudo apt-key add - curl -sL https://deb.nodesource.com/setup_lts.x | sudo -E bash - echo "deb [ arch=amd64,arm64 ] https://repo.mongodb.org/apt/ubuntu $(lsb_release -sc)/mongodb-org/4.4 multiverse" | sudo tee /etc/apt/sources.list.d/mongodb-org-4.4.list apt-get update apt-get install -y mongodb-org nodejs -ysystemctl enable mongod; systemctl start mongod
Step 5: Set up the firewall
Firewalls are good. They keep people from hacking into your droplet. That's a good thing. There's a lot more you can do here than just setting up the firewall, but this is a good first step.
Ubuntu comes preloaded with a neat little firewall, set it up by running these commands:
ufw allow 4567
ufw allow ssh
ufw enable
The first line lets you access NodeBB, the next one lets you administer the server, and the last line turns the firewall on.
Step 6: Create an unprivileged user to run NodeBB
It is important to not run most applications as the root, or administrative user. We'll create an unprivileged account now:
adduser nodebb (seems pretty straightforward, right?)
Answer the prompts as necessary. The defaults should suffice. You can set whatever password you'd like (the root user won't need to use it to log into this account. Being administrator has its privileges!)
Then log into that new account:
su nodebb (su means "switch user")
Step 7: Download and set up NodeBB
cd $HOME # Download NodeBB
git clone https://github.com/NodeBB/NodeBB.git nodebb
cd nodebb # Execute setup
./nodebb setup
The last line here will kickstart NodeBB's setup process, which will ask you a series of questions about your NodeBB. Again, the defaults are all acceptable, and you will have a chance to create the administrative user during the setup process.
Step 8: Start NodeBB!
./nodebb start
That's it! You can then navigate to your site, which is accessible at port 4567 of your droplet's IP address.
For example, if my droplet's IP address was 127.0.0.1, I'd be able to access the forum by navigating to http://127.0.0.1:4567.
If you want to see what NodeBB's doing behind the scenes, run ./nodebb log whenever you'd like. You can exit this screen by hitting Ctrl-C.
What's next?
This will get you started with a basic NodeBB installation, but you won't have anything special like a domain name or an SSL certificate.
But not to worry! Those things are fairly simple to set up as well! Our handy-dandy documentation portal contains lots of guides to get yourself situated.
Here are two good guides to proceed to, now that you're up and running:
- Configure nginx as a reverse proxy
- Getting a free SSL certificate (Nginx/Ubuntu 20)
- Use systemd to start up NodeBB automatically when the server reboots
Did you have trouble following the guide? Suggestions or comments? Feel free to reply below or post on our community forum. See you there!
We also offer professional installation services, and migration services for existing NodeBB forums that want to be managed by the NodeBB team. If you're interested in this, please reach out to us at sales@nodebb.org .
Notes
1 You can of course use no referral link at all (but that would get you nothing), or use someone else's referral link. We don't mind :) – Using our referral link nets us a small credit which goes towards paying the developers who created NodeBB!
Cover Photo Pauline Bernfeld on Unsplash